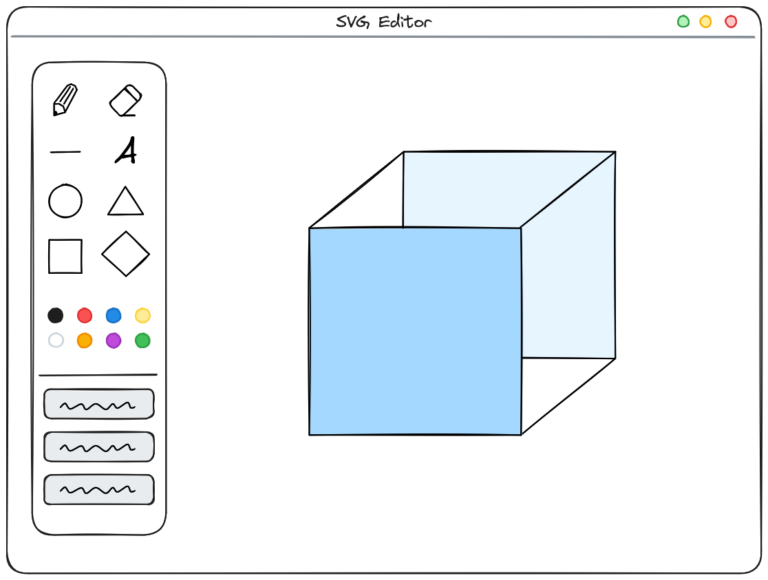
The starting point for the "Agile development" contributions is a project called SVG Editor. A new interaction for exporting a graphic as a PDF with a watermark is to be added to this.
In the first article, I showed how user stories are broken down vertically into technical requirements.
The result was an interaction with the following three features:
- The vector graphic is to be converted into a PDF.
- A watermark is to be added.
- The PDF should be saved as a file.
This article focuses on the agile implementation of these requirements. The aim is to generate as many executable stitches (increments) as possible, for which regular feedback can be provided.
Putting requirements under the knife
To illustrate the procedure, I'll take the aspects of my existing application again. I could now remove individual features from the entire interaction with the aim of implementing them one after the other. I could start with the conversion of an SVG object into a PDF. The feature falls under the Domain aspect.
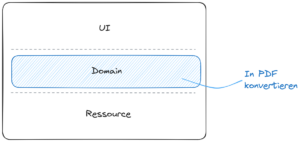
I invest about a week of work in the solution for this feature for the implementation including tests. At the end of the week, I have created a PdfConverter class that can convert a PDF from an SVG. The requirement is implemented, the tests are all green. Wonderful. But - I don't have a result that I can present to get feedback. A product owner, or someone else who cares about the result, could not trigger this feature. I cut the requirements horizontally.
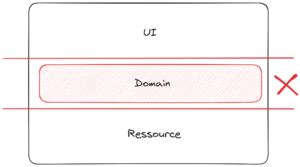
I focused on one aspect and ignored the others. This is not agile implementation. The aim of agile implementation is always to create results on which feedback can be generated. The simple trick is to cut the requirements vertically rather than horizontally.
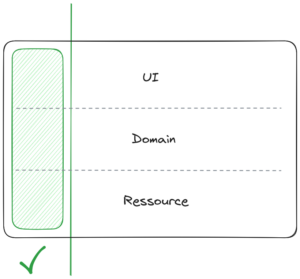
Feedback can only be given if the UI has been taken into account. This is where the interaction takes place. At the same time, it would be insufficient to limit oneself exclusively to the implementation of the UI. Then again, the product owner cannot give feedback on the content implementation. The aim of this use case is not to provide feedback to the interface, but to create a file. Implementing interface logic alone would not deliver a result.
Take small steps
Taking an agile approach means implementing the interaction with all its features piece by piece. Just as in a framework defined by Scrum, we divide the use case into several successive iterations. At the end of each iteration is an increment. Like the Potentially Shippable Product Increment at the end of a sprint, the increment is a functional interim result on which feedback can be provided. This approach makes it possible to receive feedback within a sprint instead of after two weeks of development. This allows us to obtain initial feedback after just a few days and build on it.
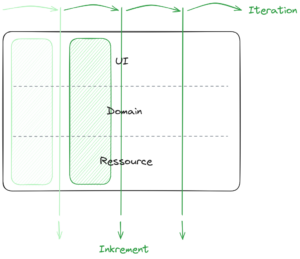
The following figure illustrates a possible implementation of the use case in 4 iterations. Each iteration implements a part of our use case. The first iteration enables the interaction to be triggered via the button and provides a function that saves an initially empty PDF file in the file system. This may be a small start, but it can be executed at the end. And there is a framework that can then be filled with content. In the next step, domain logic is added. A PDF converter class is created, which initially returns dummy data. This is saved in the PDF file. Another small increment. Another opportunity to receive feedback. In the third iteration, the actual conversion from the SVG object to the PDF is implemented. The result is saved in the file. The fourth and final iteration adds the watermark and the option for the user to select the path and name for the PDF via a file browser. The logic for saving is extended accordingly. It becomes clear how each step creates a more complete increment. The new result can be checked at the end of each iteration. Instead of feedback after two weeks, this approach gives us the opportunity to receive three pieces of feedback on intermediate statuses. That is agile implementation.
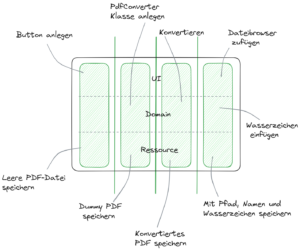
With a little practice, you can significantly increase the output of increments in your own development. You should not shy away from using dummy data at one point or another. They can help to generate increments at an early stage. In the following iterations, they are gradually replaced by real logic. It is even possible to generate an increment at the end of each working day. That's a better prospect than only being able to show a result of your own work after 2 weeks, isn't it?
Conclusion
Agile implementation is as simple as it is helpful. Through step-by-step implementation and the creation of many increments, you can quickly obtain evaluable results and thus early feedback. This makes it possible to make adjustments or respond to requests even within a sprint. At the same time, developers quickly receive confirmation and an overview of their own work. And since it is only a matter of structuring your own working methods, the time required does not even increase.


